So, I do really wish I had the funds to buy mature lavender plants to put in at the farm, but I most certainly do not. So, the next best thing would be taking and rooting cuttings from established plants, but the plants we have in the ground here are not yet big enough to ask them to sacrifice bits of themselves yet.
So, the next, next best thing? Plant seeds!
Lavender seeds need light and heat to germinate, so one needs to be prepared. Fortunately Handy Nate put together some plant growing racks for me in previous years (vegetables! flowers! all from seed!) It looks like this:
So, the next, next best thing? Plant seeds!
Lavender seeds need light and heat to germinate, so one needs to be prepared. Fortunately Handy Nate put together some plant growing racks for me in previous years (vegetables! flowers! all from seed!) It looks like this:
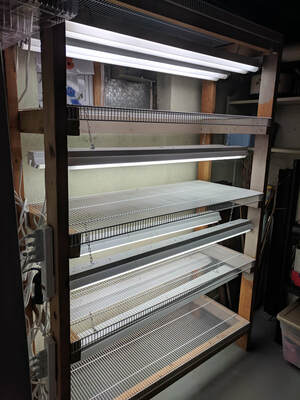
The first home for Little baby lavender plants. Over 500, this time, actually.
I am not reporting this in real time, by the way. They started out months ago as a little sparkle in my eye. and tiny, tiny little seeds in an envelope. I did all this in January. As you may have noticed, I am a slow website poster.
This is how I start lavender plants. Bear in mind that I do not always get it right. Last year's "crop" was a failure. Barely a quarter of the seeds started. I do NOT know why, though I suspect I used the wrong soil in the hurry I was in to get them started. But it was incredibly depressing. So very sad that I didn't post about it. It set us back a year, at least. Here's the beginning--figure out how many you need. I need, um, lots. So 72 cells per flat, I figured I could manage 8 flats this year, as I have only one growing rack currently set up, with one shelf taken up already with overwintered lavender seedlings, and one taken up with veggie starts a couple of months after this. The slide show below will show you all the steps.
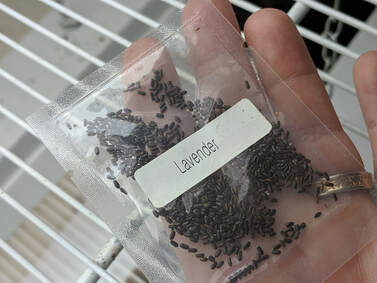
If you have bad vision, go ahead and get yourself a pair of drugstore reading glasses. I promise, you will thank me. These seeds are viciously tiny-bear in mind that my hand is not a good measure of comparison...I have tiny hands.
By the time you plant the seeds, your seed starting medium should have soaked up the water you filled the bottom tray with prior to putting the filled seed trays in them. I use a spray bottle to mist the surface of the soil before I drop the seeds on top of it. This is how you break the surface tension of the soil particles enough to accept the water it's soaking up from the bottom. I plant two seeds per cell, but you can assign your own arbitrary number. I should do three or four, but I really hate ripping them out after they've grown, and 4 plants cannot share one cell. They'll argue. However many you plant, just do it, barely pressing them in. Don't bury them--you'll smother the poor dears.
Then, put them under the lights--we have ours on timers to be on 12 hours, off 12. We use full-spectrum fluorescent bulbs in ordinary shop lights, which does well enough. I've blocked the window, so nobody outside can peer in to the basement and suspect we are growing illegal things. I'll be investigating full-spectrum LED as it becomes available, and cheap.
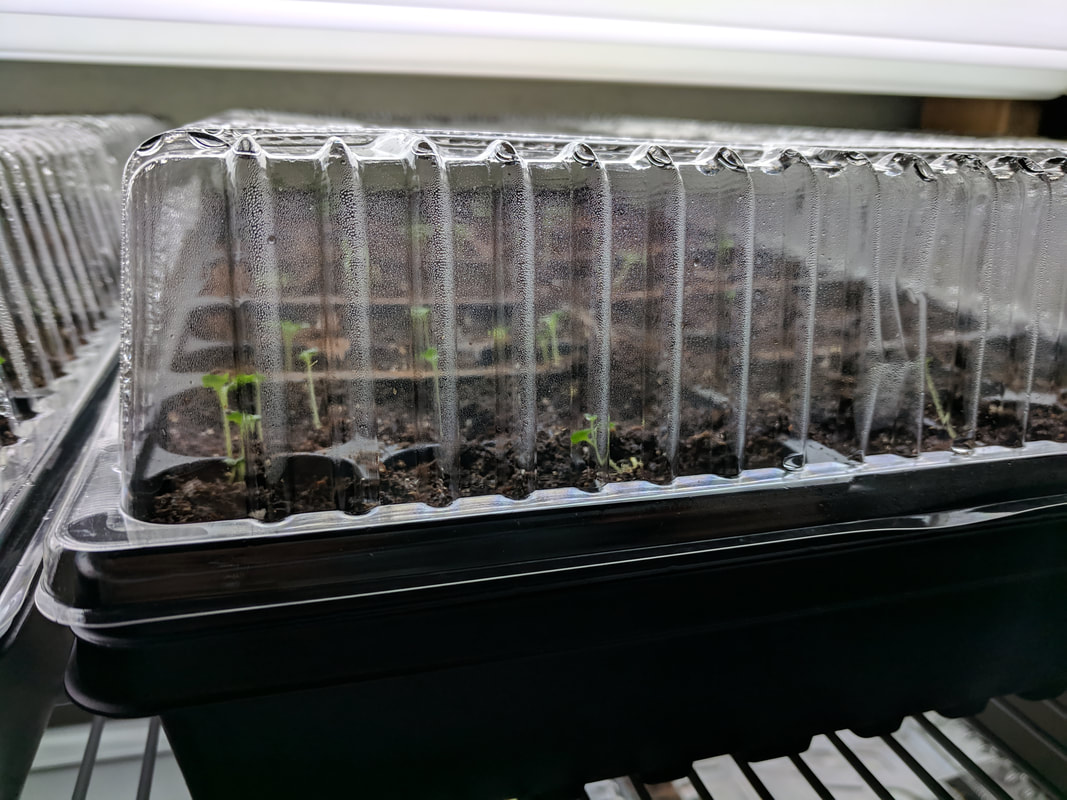
Pop the grow tops on to keep heat in, and water the trays from the bottom, between the cell tray and the water tray. Don't think you can save time by filling the bottom tray to its rim with water, and then leave these things alone for weeks at a time. They can't sit in that much water for that long; they want to dry out a little bit (ONLY a little) between waterings after they sprout.
Then be amazed! As they sprout!! And they will!! Take the grow tops off when the plants start bumping in to them.
Then, put them under the lights--we have ours on timers to be on 12 hours, off 12. We use full-spectrum fluorescent bulbs in ordinary shop lights, which does well enough. I've blocked the window, so nobody outside can peer in to the basement and suspect we are growing illegal things. I'll be investigating full-spectrum LED as it becomes available, and cheap.
Pop the grow tops on to keep heat in, and water the trays from the bottom, between the cell tray and the water tray. Don't think you can save time by filling the bottom tray to its rim with water, and then leave these things alone for weeks at a time. They can't sit in that much water for that long; they want to dry out a little bit (ONLY a little) between waterings after they sprout.
Then be amazed! As they sprout!! And they will!! Take the grow tops off when the plants start bumping in to them.
More later on such fun things as "hardening off" and light requirements and planting instructions...

 RSS Feed